After a bit of trial and error I was able to setup my Hashnode blog using AWS's Route 53. Below I have outlined the steps I followed to successfully deploy my Hashnode blog .
Step 1 - Enter your personal domain name
 After creating your Hashnode account you will need to setup your blog. Begin by clicking "Start my blog" in your account menu (click the account icon in the bottom left corner of the screen) then follow the onscreen instructions.
Step 2 - Choosing a domain option
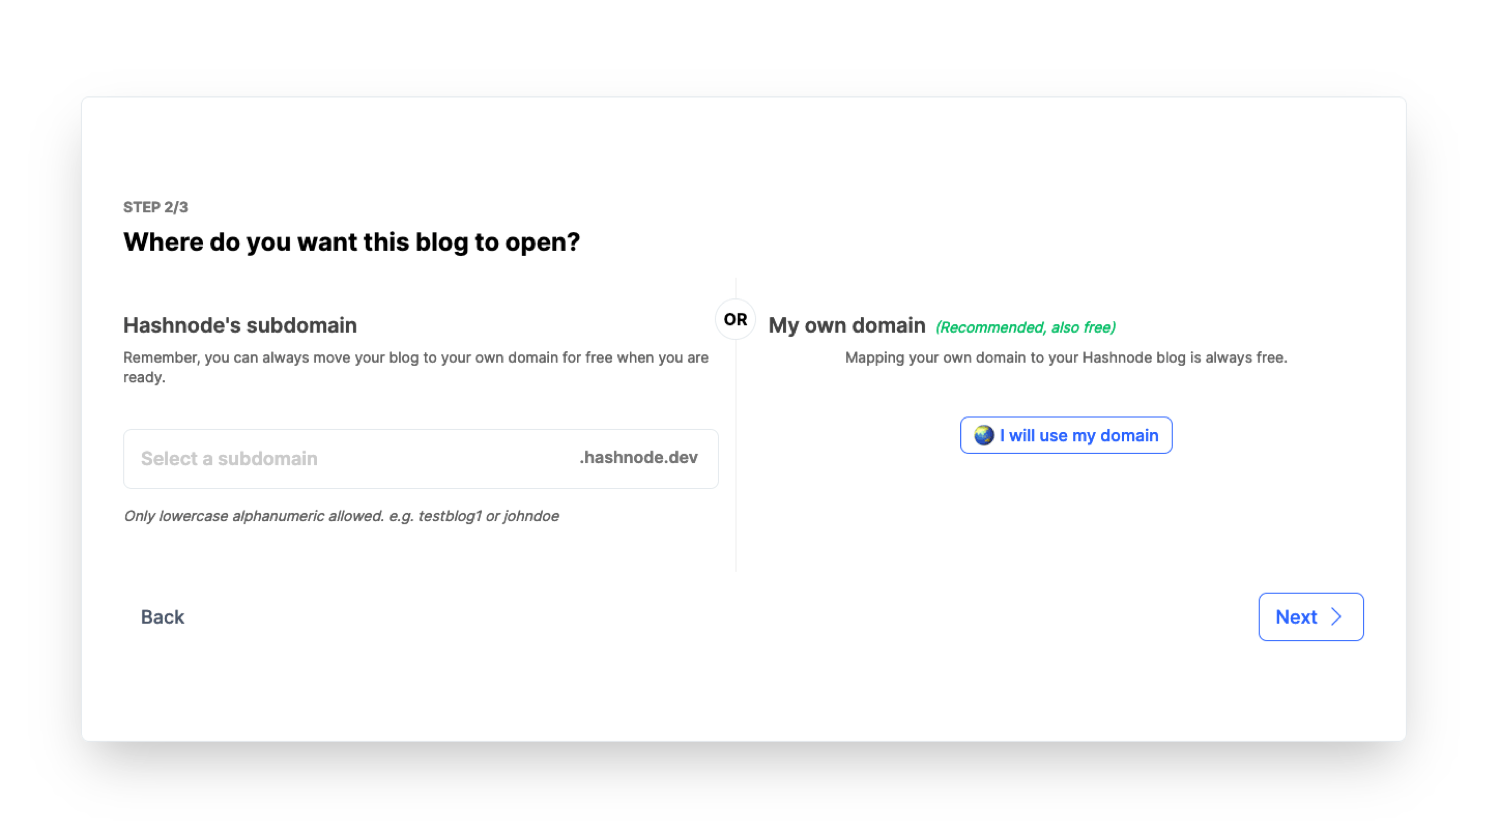 For this step I selected "🌎 I will use my domain" then click "Next"
Step 3 - Enter your domain name
 Enter your desired domain name then click "Next"
Step 4 - Map your domain to Hashnode
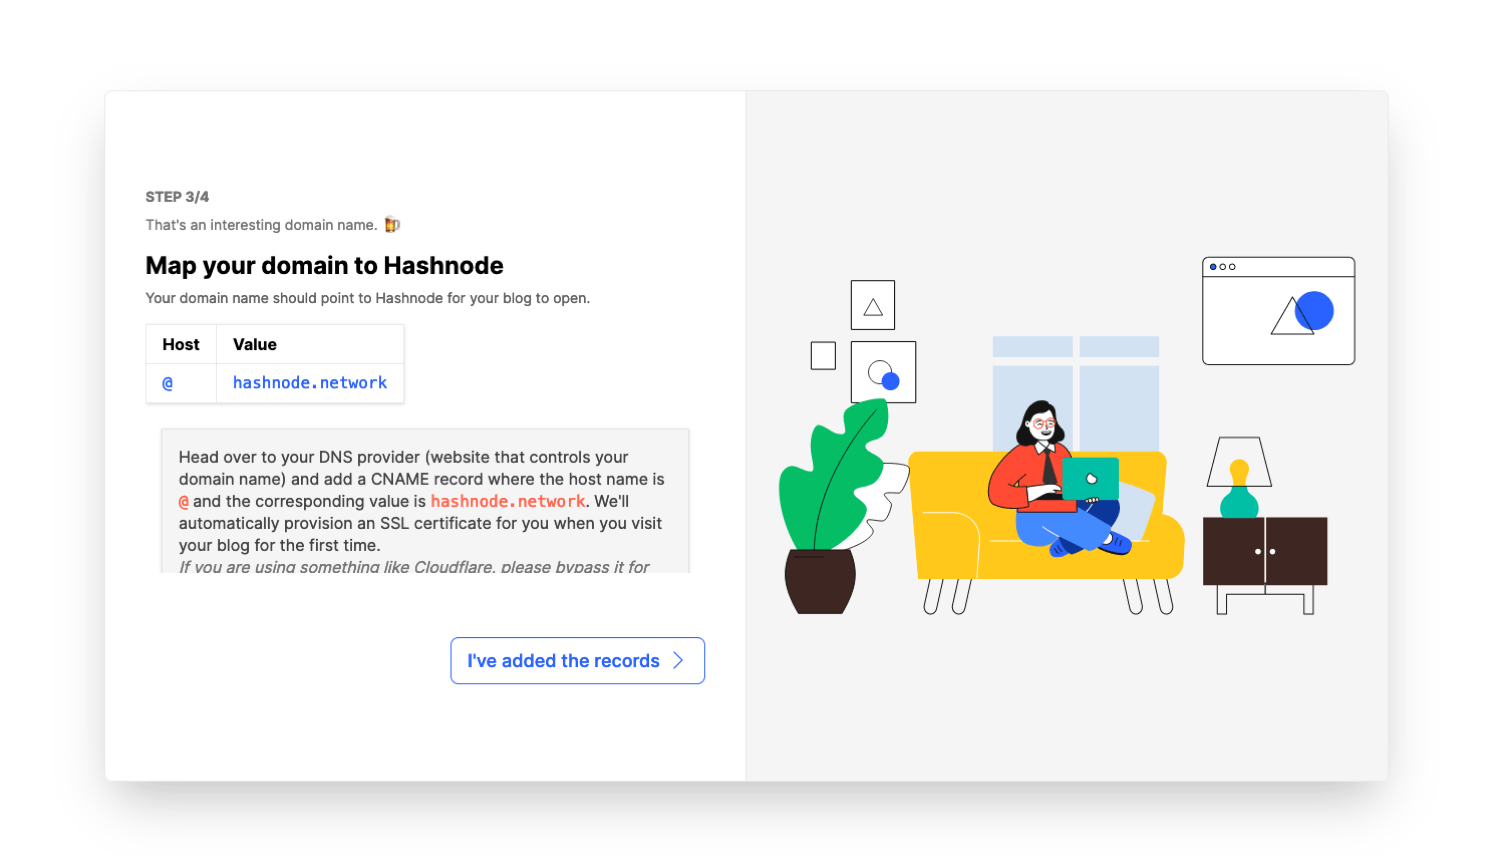 This is where I struck out on my own a bit. Instead of setting the host to @ I set it to "blog". You will need to do this in AWS Route 53 so, do not worry about this step right now - I will cover this in more depth at step 8.
Go ahead and click "I've added the records"
Step 5 - Woohoo, almost there!
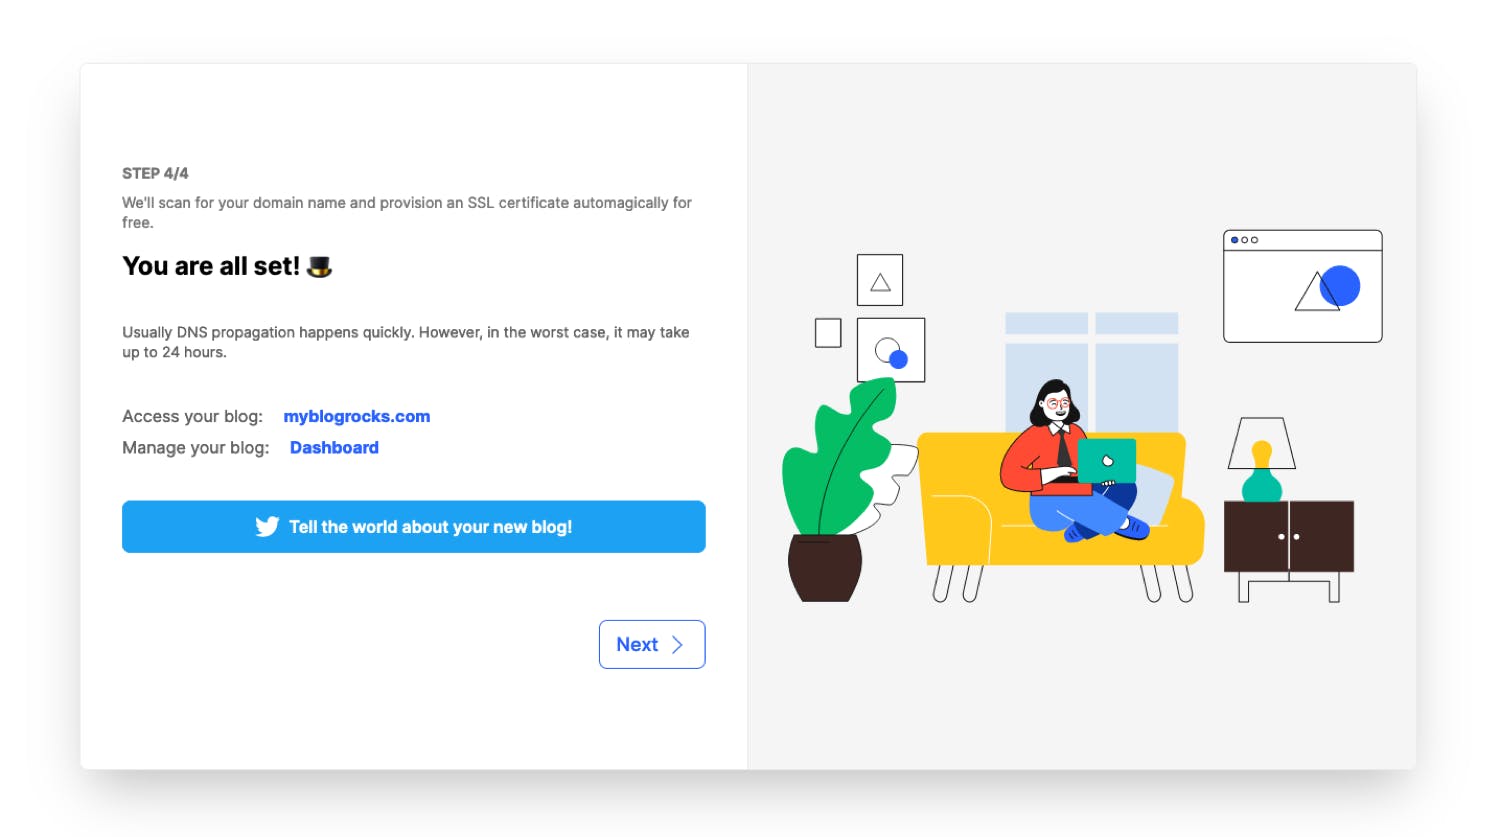 Congratulations! Your blog is nearly setup, just a few more steps.
Step 6 - Open up the Hashnode blog dashboard
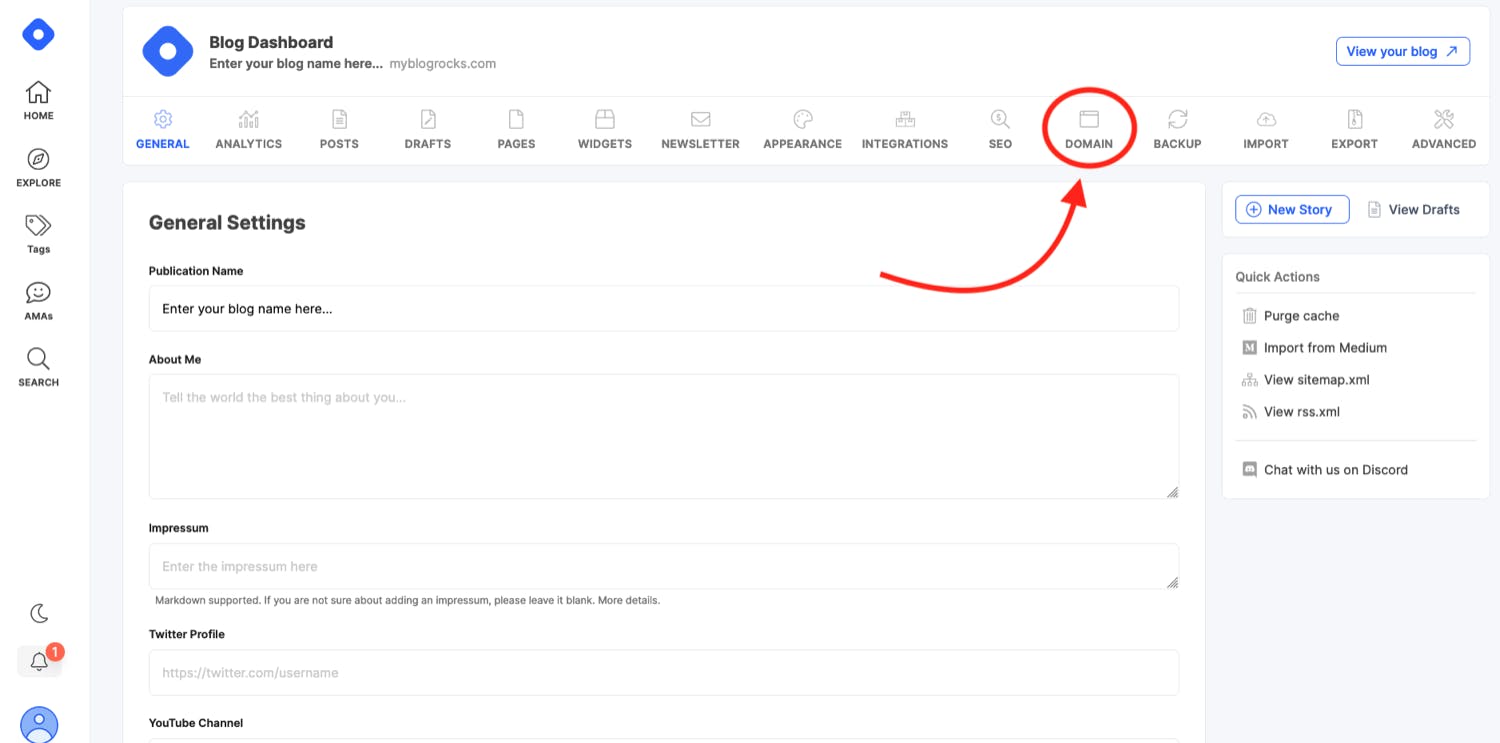 Navigate to your blog's dashboard and select the "Domain" tab. It will open a window that looks like...
Step 7 - Update blog url via the Hashnode dashboard
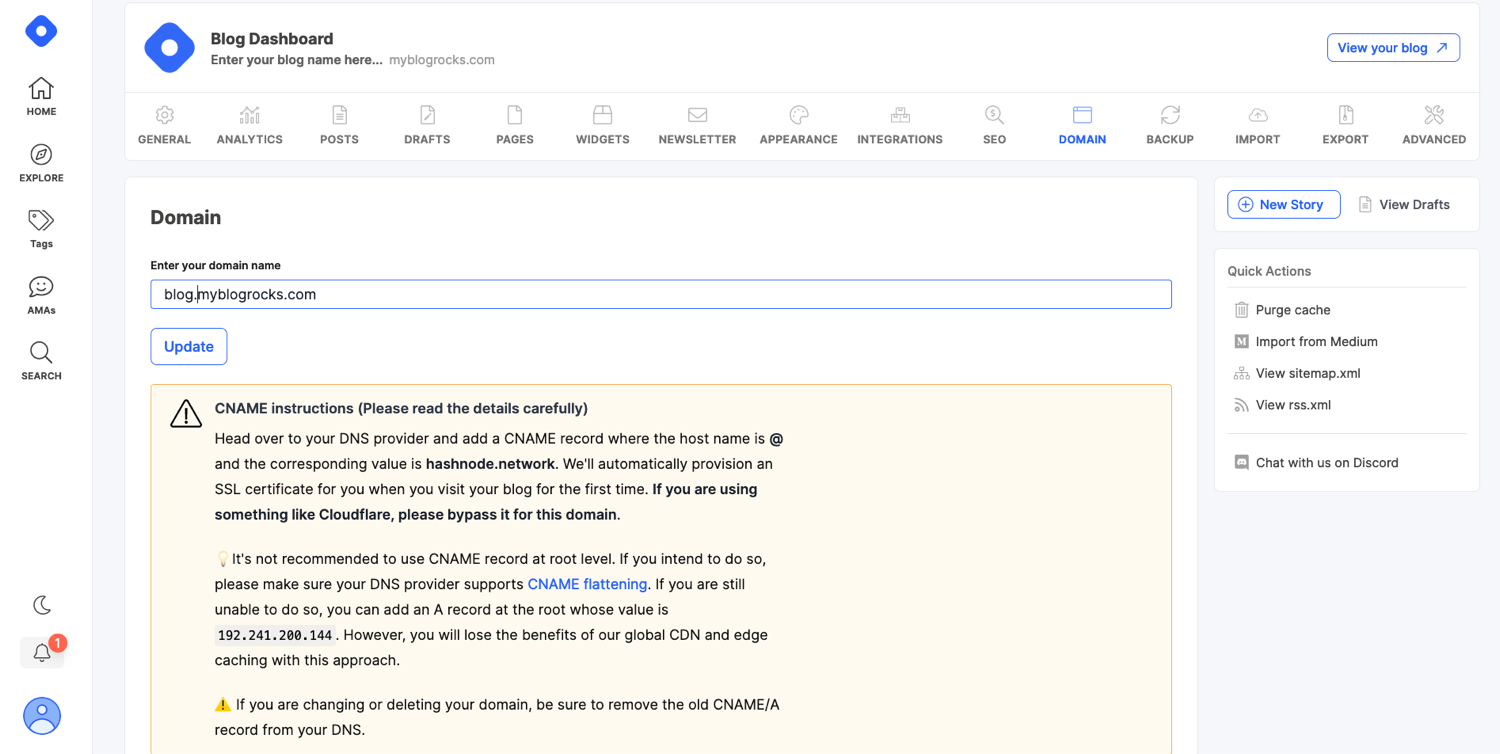 Where it says "Enter your domain name" enter blog.yourblogname.com. The key is to make sure blog is appended to the beginning of your domain name. Then click update.
Step 8 - Create CNAME record using AWS Route 53
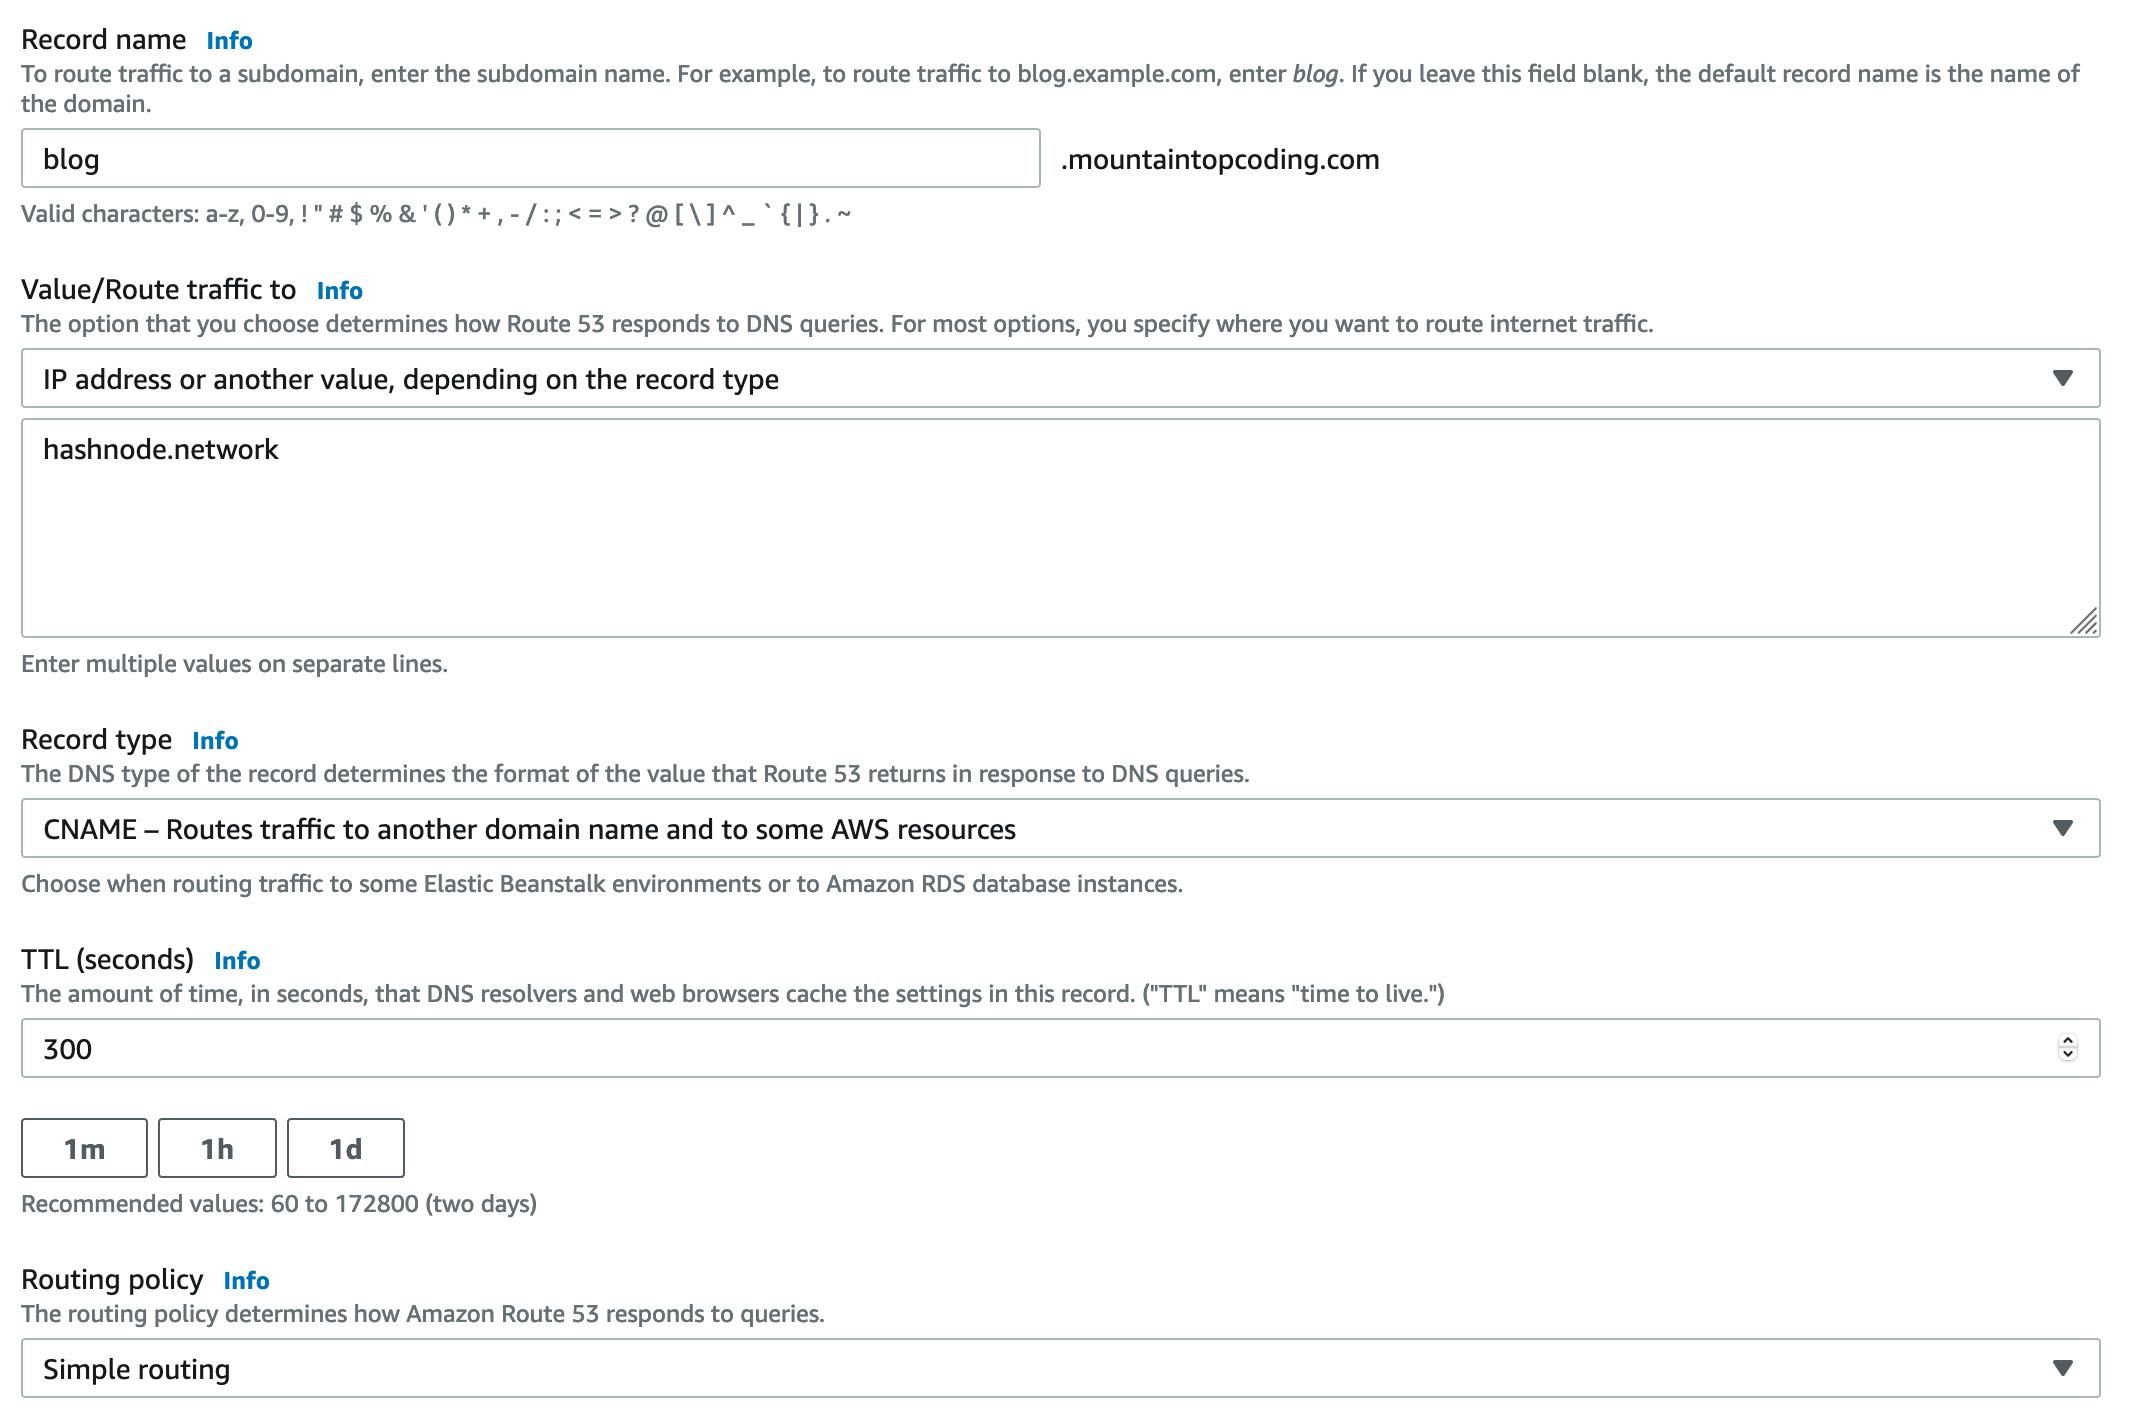 Navigate to your AWS Dashboard and open Route 53. Select the domain you chose in Step 5 and create a new record following these steps:
Set the record name to "blog"
Value/Route traffic to should be set to "IP address or another value...."
Make sure in the text box you add "hashnode.network"
Record type is CNAME
TTL I left at default, which was 300
Routing policy I left at default, which was Simple routing
Step 9 - Enjoy your new blog
While AWS and Hashnode say it could take 24 hours for the changes to propagate my domain mapping was almost instantaneous.
If you have any questions or run into any problems feel free to reach out in the comments below or contact me directly here

